Following prerequisite steps must be performed in Fusion ERP in order to enable FAW – ERP Analytics.
- Assign Financial Categories to Natural Accounts
- Make the key flexfield segments of your chart of accounts BI-enabled.
- Create Segment labels for segments and map them to BI object names
- Flatten and Publish hierarchies
- Assign Hierarchies to segments in COA
- Exchange rate setup for Analytics currency
- EFF force deployment
- Sign in to Oracle ERP Cloud
- Navigate to your implementation project or the Setup and Maintenance page.
- Select Setup: Financials.
- Select Financial Reporting Structures and then select the Manage Chart of Accounts Structure Instances task.
- In Manage Chart of Accounts Structure Instances, select General Ledger in Module and click Search.
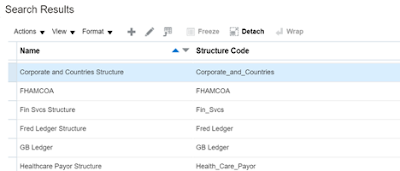
- In Search Results, click Manage Structure Instances.
- Search for the name of your structure.
- Select your Chart of Accounts Instance and click Edit.
- In Segment Instances, identify your natural account segment in the Segment Code column. Click the corresponding value in the Value Set Code.
- In Manage Value Sets under Search Results, click Manage Values, and then click Search to list all the natural account codes.
- In Search Results, ensure that all the active accounts have financial categories assigned to them.


- To map the financial categories to active accounts we can use the File Based Data Import (FBDI) template.
- To download these values into a spreadsheet, click Action and select Export to Excel.
Make the Key Flexfield Segments of your Chart of Accounts BI-Enabled
- Sign in to Oracle ERP Cloud.
- Navigate to your implementation project or the Setup and Maintenance page.
- Select Setup: Financials.
- Select Financial Reporting Structures and then select the Manage Chart of Accounts Structure Instances task.
- In Manage Chart of Accounts Instances, select General Ledger in Module and click Search.
- In Search Results, click Manage Structure Instances.
- Search for the name of your structure.
- Select your chart of accounts instance.
- Click Edit.
- Edit each segment and ensure that the BI enabled check box is selected.


Create Segment Labels for Desired Segments and Map them to BI Object Names
Populate the BI object name for each of the segment labels that you plan to leverage with Oracle Transaction Business Intelligence (OTBI) for reporting and analysis.
- Sign in to Oracle ERP Cloud
- Navigate to your implementation project or the Setup and Maintenance page.
- Select Setup: Financials.
- Select Financial Reporting Structures and then select the Manage Chart of Accounts Structure Instance task.
- In Manage Chart of Accounts Instances, select General Ledger in Module and click Search
- In Search Results, click Actions, and then click Manage Segment Labels.
- In Manage Segment Labels, populate the BI Object Name for all the segment labels that you want to map. Create segment labels if you aren’t using the predefined segment labels.

| Segment Label | BI Object Name |
| FA_COST_CTR | Dim - Cost Center |
| GL_BALANCING | Dim - Balancing Segment |
| GL_ACCOUNT | Dim - Natural Account Segment |
For all other non-qualified segment labels that you want to leverage within Oracle Analytics for Applications, populate the BI Object Name with one of the following:
Note: You aren’t allowed to assign a BI object name to the predefined segment labels. You must create a new segment label and assign the BI object name to it.
Assign these segment labels to your segment in the chart of accounts structure using these steps:
- In Search Results, click Actions, and then select Manage Structure.
- Click Search.
- In Search Results, select the chart of accounts structure and click Edit.
- In Segments, select the segment and click Edit.

- Repeat the steps for all the segments.
- After assigning labels to all the segments, deploy the flexfield using these steps:
- Navigate to the Manage Chart of Accounts Structure Instances task.
- In Search Results, select General Ledger in Module and click Search.
- In Search Results, ensure that General Ledger is selected, and then click Deploy Flexfield.
Note: If you’re using the Intercompany Segment and want to use it for reporting, then you must create a label as you can’t use the existing GL_INTERCOMPANY because it is read only. You must create a segment label and assign the BI Object Name to it.
Flatten and Publish Hierarchies in Oracle ERP Cloud
Use these instructions to flatten the hierarchies:
- Sign in to Oracle ERP Cloud
- Navigate to your implementation project or the Setup and Maintenance page.
- Select Setup: Financials.
- Select Financial Reporting Structures and then select the Manage Account Hierarchies task.
Note: Ensure that you select show as All Tasks.
- In Manage Account Hierarchies, identify the tree structure that you want to flatten. If you have more than one active version of the tree, then you must flatten all active versions. FAW will only consider active tree versions.
- In Search Results, select the version, select Actions, select Flatten, and then select Column Flattening.


- In Manage Account Hierarchies, select Online Flattening, and then select Force Flattening.

Repeat these steps for all versions of all segments of your chart of accounts. You must complete these steps for all hierarchies of all segments.
Use the instructions to publish the hierarchies:
- Navigate to your implementation project or the Setup and Maintenance page.
- Select Setup: Financials.
- Select Financial Reporting Structures and then select the Publish Account Hierarchies task.
Note: Ensure that you select show as All Tasks.
- In Publish Account Hierarchies, select the hierarchy and click Search.
- In Search Results, select the Publish check box for the account hierarchies that you want to publish.
- Select the Publish button to update the balances cubes.
Assign Hierarchies to Each Segment in Chart of Accounts
- Sign in to Oracle ERP Cloud
- Navigate to your implementation project or the Setup and Maintenance page.
- Select Setup: Financials.
- Select Financial Reporting Structures and then select the Manage Chart of Accounts Structure Instances task.
- Select your Chart of Accounts Instance.
- Select the applicable segment code and click Edit.
- Populate the tree name for the segment in the Chart of Accounts Instance.

After assigning labels to all the segments, deploy the flexfield using these instructions:
- Navigate to the Manage Chart of Accounts Structure Instances task.
- In Manage Chart of Accounts Structure Instances, select General Ledger in Module and click Search.
- In Search Results, ensure that General Ledger is selected, and then click Deploy Flexfield.

Exchange Rates setup for Analytics Currency
In Oracle Analytics for Applications reporting configuration, we select an Exchange rate type that application uses to convert from Ledger currency to Analytic currency. We need to ensure that exchange rates are defined in Oracle ERP Cloud for this rate type in order for the Analytic currency amounts to be calculated. All the out of the box Decks, Cards and Dashboards uses analytic currency amounts and for these to work, this set up needs to be completed.
EFF Force Deployment
FA had made changes to base VOs that required EFF Force Deployment (Refresh and Deploy Offline) to be run so that the code and the MDS artifacts are in Sync in the prior release.
Steps to be following:-
Login to ERP Cloud
- Run Refresh and Deploy Offline from the Manage Extensible Flexfields taskflow for EGO_ITEM_EFF
- From Scheduled Processes run Import Oracle Fusion Data Extensions for Transactional Business Intelligence job to sync up the MDS with BI.
Please refer to Oracle Support Document 2139923.1 for additional information.
No comments:
Post a Comment